Sand Away Flaws
You have to start with a perfectly smooth surface area to finish up by utilizing flawlessly repainted walls or woodwork. Sanding levels outs spackle or joint-compound spots as well as flattens ridges around nail holes.Need a Painter in Calgary
Sand the wall surfaces from the baseboard to the ceiling by utilizing fine grit sanding paper on a sanding pole. Then sand horizontally along the baseboard as well as ceiling. Don't place a great deal of tension on the sanding post or the head could adore and harm the wall surface. Sand woodwork with a sanding sponge to obtain into gaps.
Use a professional Calgary painter
Usage Tinted Primer
Before the pros repaint wall surfaces, they fill up openings and patch cracks with joint compound. If you create straight over it, the compound will pull the dampness out of the paint, offering it a level, boring appearance (an issue called "flashing"). Those areas will certainly look visibly various compared to the remainder of the wall. To avoid that, pros prime the wall surfaces just before painting.
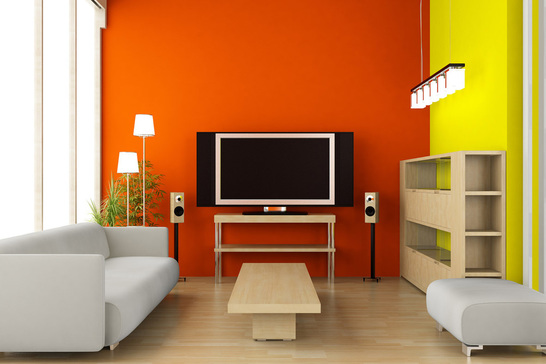
Instead of relying on white primer, pros typically have it colored grey or a color that's similar to the coating paint. Tinted guide does a far better work of covering the alreadying existing paint shade than plain primer, so your finish coat will be a lot more dynamic and may call for fewer layers. This is particularly true with shades like red or orange, which might need 3 or more layers without a guide.
Press Tape With a Cement Knife
Absolutely nothing is much more frustrating when you've completed paint than to peel off tape off the woodwork and also discover the paint hemorrhaged via. To avoid the pain-in-the-neck duty of scraping off the paint, do a detailed work of adhering the tape just before you start.
Use the blue painter's tape instead of masking tape. Masking tape can leave behind a sticky residue that's hard to clean off. Plus, paint could cause the tape to twist or get curly, which lets paint run underneath it. Painter's tape can be left on for days (some up to two weeks) and also still peel off cleanly. And it stops paint bleed without buckling.
Eliminate Brush and Lap Marks By utilizing Paint Extender.
The secret to a coating that's complimentary of lap as well as brush marks is mixing a paint extender (also called a paint conditioner), such as Floetrol, into the paint. This does two things. It reduces down the paint drying out time, providing you a longer window to overlap just-painted locations without getting awful lap marks that happen when you create over dried paint as well as darken the shade. Second, paint extender levels out the paint so brush strokes are virtually eliminated (or a minimum of considerably a lot less apparent). Pros use extenders when painting drywall, woodwork, closets as well as doors. Supplier's directions inform you just how much extender to include each gallon of paint.
Scratch a Ridge in Textured Ceilings.
The problem by utilizing painting along the edge of textured ceilings is that it's almost impossible to get a straight line along the top of the wall without getting paint on the ceiling bumps. "This allows you cut in without obtaining paint on the ceiling appearance," one of our pros claims. "The screwdriver creates a tiny ridge in the ceiling, so the pointers of your paint bristles naturally go right into it.
Scrape (Don't Tape) Windows.
Don't trouble taping windows when painting sashes-- it takes a lengthy time and paint usually winds up on the glass anyhow. Go ahead and let paint hop on the glass. Once it's dry, just scuff it off with a razor blade. The paint peels in seconds. "Just make sure to not crack the paint bond in between the wood and also the glass," a pro cautions. "Otherwise, moisture can get on the wood and cause rot.".
Box Paint for Consistent Color.
The "exact same" color of paint can range cans. "That distinction can be glaringly apparent if you stand out open a brand-new gallon halfway via a wall surface," a retired painter informs PM. To ensure shade uniformity throughout, pros blend their containers of paint in a 5 gallon container (a procedure called "boxing").
Some pros after that paint directly out of the bucket. This eliminates the should put paint into a roller tray, though the heavy pail is more challenging to move.
Want real help?About us:
we are you local professional painter base out of Calgary Alberta, we provide all types of painting form exteriors to interior painting.
Great Western Painting
704 Lake Bonavista Drive Southeast Calgary, Alberta T2J 0N1
Phone: (403) 285-7776
You have to start with a perfectly smooth surface area to finish up by utilizing flawlessly repainted walls or woodwork. Sanding levels outs spackle or joint-compound spots as well as flattens ridges around nail holes.Need a Painter in Calgary
Sand the wall surfaces from the baseboard to the ceiling by utilizing fine grit sanding paper on a sanding pole. Then sand horizontally along the baseboard as well as ceiling. Don't place a great deal of tension on the sanding post or the head could adore and harm the wall surface. Sand woodwork with a sanding sponge to obtain into gaps.
Use a professional Calgary painter
Usage Tinted Primer
Before the pros repaint wall surfaces, they fill up openings and patch cracks with joint compound. If you create straight over it, the compound will pull the dampness out of the paint, offering it a level, boring appearance (an issue called "flashing"). Those areas will certainly look visibly various compared to the remainder of the wall. To avoid that, pros prime the wall surfaces just before painting.
Instead of relying on white primer, pros typically have it colored grey or a color that's similar to the coating paint. Tinted guide does a far better work of covering the alreadying existing paint shade than plain primer, so your finish coat will be a lot more dynamic and may call for fewer layers. This is particularly true with shades like red or orange, which might need 3 or more layers without a guide.
Press Tape With a Cement Knife
Absolutely nothing is much more frustrating when you've completed paint than to peel off tape off the woodwork and also discover the paint hemorrhaged via. To avoid the pain-in-the-neck duty of scraping off the paint, do a detailed work of adhering the tape just before you start.
Use the blue painter's tape instead of masking tape. Masking tape can leave behind a sticky residue that's hard to clean off. Plus, paint could cause the tape to twist or get curly, which lets paint run underneath it. Painter's tape can be left on for days (some up to two weeks) and also still peel off cleanly. And it stops paint bleed without buckling.
Eliminate Brush and Lap Marks By utilizing Paint Extender.
The secret to a coating that's complimentary of lap as well as brush marks is mixing a paint extender (also called a paint conditioner), such as Floetrol, into the paint. This does two things. It reduces down the paint drying out time, providing you a longer window to overlap just-painted locations without getting awful lap marks that happen when you create over dried paint as well as darken the shade. Second, paint extender levels out the paint so brush strokes are virtually eliminated (or a minimum of considerably a lot less apparent). Pros use extenders when painting drywall, woodwork, closets as well as doors. Supplier's directions inform you just how much extender to include each gallon of paint.
Scratch a Ridge in Textured Ceilings.
The problem by utilizing painting along the edge of textured ceilings is that it's almost impossible to get a straight line along the top of the wall without getting paint on the ceiling bumps. "This allows you cut in without obtaining paint on the ceiling appearance," one of our pros claims. "The screwdriver creates a tiny ridge in the ceiling, so the pointers of your paint bristles naturally go right into it.
Scrape (Don't Tape) Windows.
Don't trouble taping windows when painting sashes-- it takes a lengthy time and paint usually winds up on the glass anyhow. Go ahead and let paint hop on the glass. Once it's dry, just scuff it off with a razor blade. The paint peels in seconds. "Just make sure to not crack the paint bond in between the wood and also the glass," a pro cautions. "Otherwise, moisture can get on the wood and cause rot.".
Box Paint for Consistent Color.
The "exact same" color of paint can range cans. "That distinction can be glaringly apparent if you stand out open a brand-new gallon halfway via a wall surface," a retired painter informs PM. To ensure shade uniformity throughout, pros blend their containers of paint in a 5 gallon container (a procedure called "boxing").
Some pros after that paint directly out of the bucket. This eliminates the should put paint into a roller tray, though the heavy pail is more challenging to move.
Want real help?About us:
we are you local professional painter base out of Calgary Alberta, we provide all types of painting form exteriors to interior painting.
Great Western Painting
704 Lake Bonavista Drive Southeast Calgary, Alberta T2J 0N1
Phone: (403) 285-7776
 RSS Feed
